Problem
The first lab of the semester introduces us to the basic concepts that we will use going forward in lab. Simulink is a powerful tool that enables us to build models using an easy to use graphical user interface (GUI). The GUI incorporates a drag and drop style of building different models from its vast library of different blocks. A combination of these blocks can form a very complex system. The system can model real world scenarios such as a factory’s reliability/efficiency, a city’s power infrastructure gird, cell phone network load, etc.
We can use Simulink with an Arduino library to help us take in data from an external device automatically. The Arduino in this lab acts an analog to digital converter (ADC). In this lab we use the ADC to capture a varying resistance value, but its limitations are endless. Once we have our data captured using Simulink we can move it to MatLab.
MatLab has powerful functions that we can use to analyze the data we collected from the Arduino. In this lab we will experiment with the different collection methods available to us which will help us form a basic understanding of the hardware we will be working with this semester
Procedure
In order to begin the experiment we had to identify what port the Arduino was
using to communicate. Knowing the port is necessary to open communications
between the Arduino and MatLab. First we programed the Arduino to act as an ADC
by loading sketches to the board. Once the Arduino is setup and the port is
known we can execute the command 𝑎 = 𝑎𝑟𝑑𝑢𝑖𝑛𝑜(’/𝑑𝑒𝑣/ 𝑡𝑡𝑦𝑆101’); to begin
communication.
Now that we have communication between MatLab and the board, we begin some
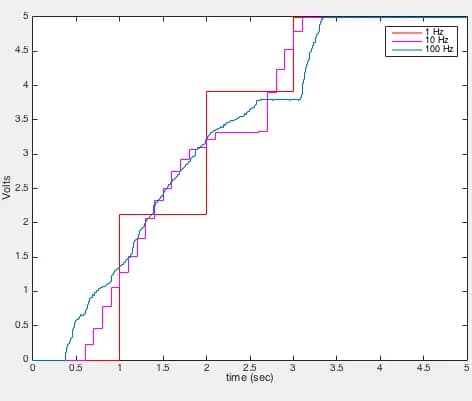
tests. 𝑎𝑛𝑎𝑙𝑜𝑔𝑅𝑒𝑎𝑑 is a command that reads in data. The first test we perform
is reading in an analog voltage signal applied to a specific pin. By varying
the resistance using the potentiometer, we ensured that the circuit was set up
properly and that the Arduino and MatLab were communicating as we expected. If
the circuit was set up properly, and the communication between the hardware and
software was functioning, we expected voltage readings between 0 and 1024. This
is because the Arduino has a 10-bit analog to digital converter (ADC). Once
this was debugged we began the next part of the experiment.